1 (509) 228-8646
 info@koipondexperts.com

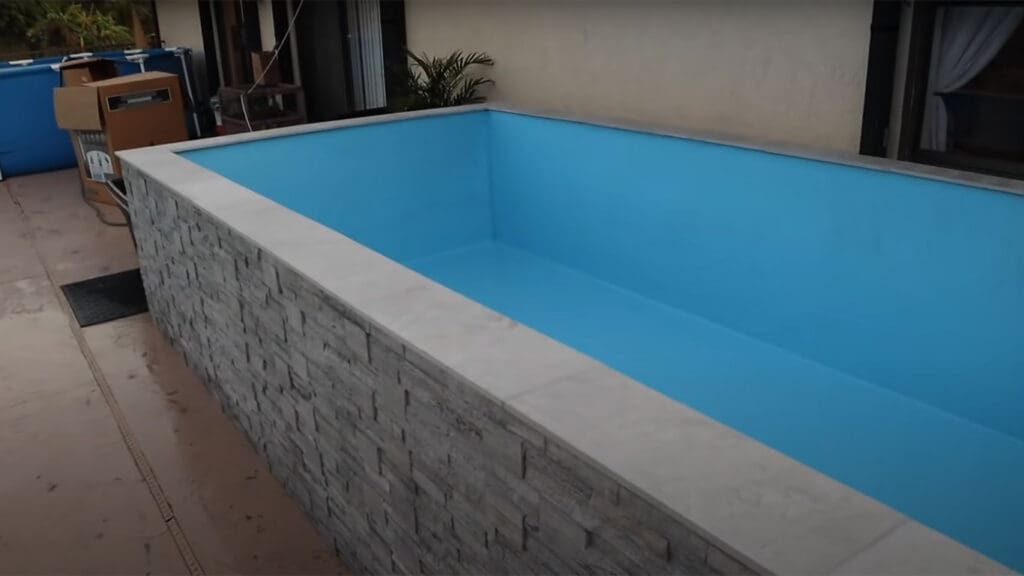
Painting the interior surfaces of a koi pond can be an essential aspect of maintaining a healthy and aesthetically pleasing environment for your fish. Koi ponds are not just water features; they are carefully designed habitats that support the life and well-being of koi fish. Painting the interior surfaces of a koi pond can provide several benefits that enhance both the appearance and functionality of the pond.
Painting your koi pond is not merely a cosmetic choice but a practical one that contributes to the health of the fish and the longevity of the pond itself. It’s an investment in the beauty and functionality of a cherished part of your garden or outdoor space. By selecting the right materials and approach, this process not only enhances the visual appeal but also protects the pond’s structure, creating a harmonious and thriving environment for your koi.
How to Paint a Koi Pond- Core Insights:
Painting the interior surfaces of a koi pond is a thoughtful and multifaceted process that goes beyond mere aesthetics. By choosing the right materials and approach, it enhances the pond’s appearance, promotes the health of the aquatic life, protects the structure, and serves as a practical investment in the longevity and beauty of this cherished outdoor feature.
Understanding Koi Ponds
Importance of Koi Ponds
Koi ponds are a popular feature in many home landscapes worldwide. They are not only aesthetically pleasing but also provide a home for beautiful and colorful fish. Koi fish are a symbol of good luck, prosperity, and longevity in Japanese culture. Therefore, having a koi pond in your backyard can add value to your home and bring a sense of tranquility to your outdoor space.
Koi ponds also have many benefits for the fish. They provide a safe and controlled environment for the fish to live in, ensuring they have enough space to swim and grow. Koi ponds also help to regulate the water temperature, which is important for the health and well-being of the fish.
Types of Koi Ponds
There are two main types of koi ponds: natural and man-made. Natural koi ponds are created by digging a hole in the ground and lining it with a pond liner. They are designed to blend in with the surrounding landscape and mimic the natural environment of the fish. Natural koi ponds are typically larger and require more maintenance than man-made koi ponds.
Man-made koi ponds, on the other hand, are designed and constructed by humans. They can be made from a variety of materials such as concrete, fiberglass, or plastic. Man-made koi ponds are typically smaller and easier to maintain than natural koi ponds.
When choosing the type of koi pond to build, it is important to consider your budget, available space, and desired level of maintenance. A natural koi pond may be more expensive and require more maintenance, but it can provide a more natural and aesthetically pleasing environment for your fish. A man-made koi pond may be more affordable and easier to maintain, but it may not blend in with your landscape as well as a natural koi pond.

Preparing for Painting
Before you start painting your koi pond, it is important to prepare properly. This section will cover the key steps you need to take to ensure that your painting goes smoothly and safely.
Choosing the Right Paint
Selecting the appropriate paint for a koi pond is a critical step in the preparation process. Here’s what you need to consider:
- Type of Paint: Look for paints specifically designed for aquatic environments. These paints are formulated to be non-toxic to fish and plants and are resistant to the unique challenges posed by water, such as algae growth and constant moisture.
- Color Consideration: The color of the paint can greatly affect the appearance of the pond. Lighter shades may create a sense of depth and reflect more light, enhancing the visibility of the fish. Darker shades can provide a natural, deep-water look that contrasts beautifully with colorful koi.
- Compatibility with Existing Materials: Ensure that the paint is compatible with the materials of your pond, such as concrete, fiberglass, or liner. The wrong type of paint may not adhere properly or could cause damage over time.
- Durability and UV Resistance: Choose a paint that offers long-lasting protection and is resistant to UV rays if the pond is exposed to sunlight. This will help maintain the color and integrity of the coating.
- Environmental Considerations: Opt for paints that are environmentally friendly and comply with local regulations. Some paints may contain harmful chemicals that could leach into the surrounding soil or groundwater.
- Application Method: Consider how the paint will be applied. Some paints may require special tools or techniques for proper application. Read the manufacturer’s instructions carefully to understand the requirements.
- Consult with Professionals: If in doubt, consult with a pond professional or a reputable supplier. They can provide guidance on the best products for your specific pond and its unique needs.
- Test a Small Area: If possible, test the paint on a small, inconspicuous area to ensure it adheres well and looks as expected.

WaterBlock Acrylic Masonry Waterproofer Paint
Gathering Necessary Tools
Here’s a list of materials you’ll need to gather before beginning the painting process for a koi pond:
- Pond-Specific Paint: A paint that is specifically designed for aquatic environments and is non-toxic to fish and plants.
- Primer: If required by the paint manufacturer, a suitable primer for the pond’s surface material.
- Brushes and Rollers: Various sizes to suit different areas of the pond.
- Paint Trays: For holding and rolling the paint.
- Pressure Washer or Scrub Brushes: For cleaning the surface prior to painting.
- Sealant or Patching Material: To repair any cracks or imperfections.
- Gloves and Masks: For personal protection during the cleaning and painting process.
- Drop Cloths or Tarps: To protect surrounding areas from paint splatters.
- Tape: For masking off areas that should not be painted.
- Cleaning Supplies: Such as soap and water, for cleaning tools after painting.
Having these materials on hand before you begin will help ensure a smooth and efficient painting process, allowing you to focus on the task at hand without unnecessary interruptions.
Safety Measures
Here are some safety measures to take when painting a koi pond:
- Wear Protective Gear: Including gloves, masks, and eye protection to prevent exposure to paint and cleaning chemicals.
- Use Non-Toxic Paint: Ensure the paint is specifically designed for ponds and is safe for aquatic life.
- Follow Manufacturer’s Instructions: Adhere to the guidelines on the paint and primer containers for proper application and handling.
- Ensure Proper Ventilation: If working in an enclosed space, make sure there’s adequate airflow to dissipate fumes.
- Avoid Slip Hazards: Keep the work area clean and dry to prevent slips and falls.
- Store Materials Safely: Keep paint and other materials out of reach of children and pets.
- Dispose of Waste Properly: Follow local regulations for disposing of paint and cleaning supplies.
By adhering to these safety measures, you can help ensure a safe and successful painting process for your koi pond.
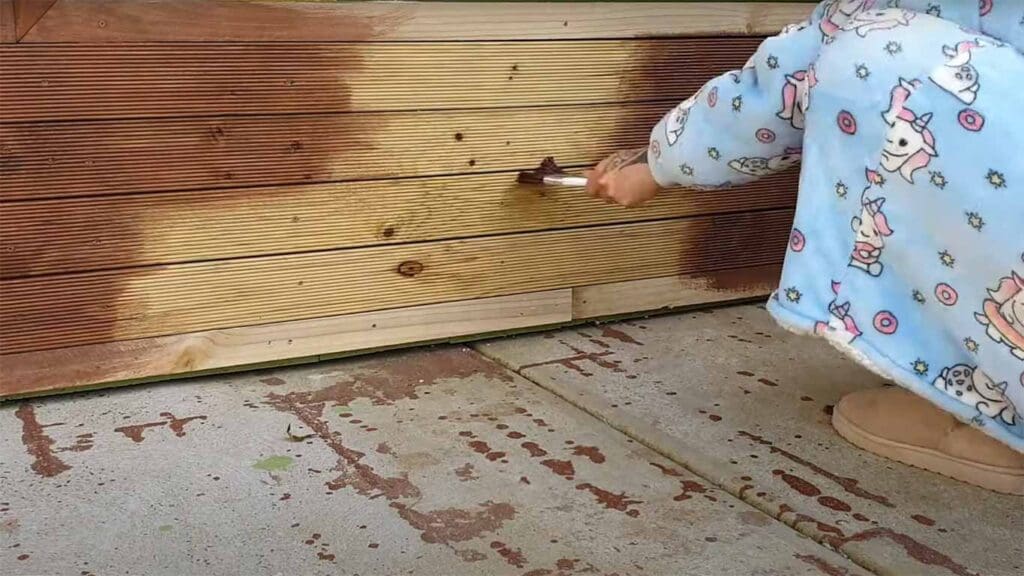
Painting Process

When it comes to painting a koi pond, there are a few important steps to follow to ensure that the end result is a beautiful and long-lasting finish. In this section, we will go over the three main steps of the painting process: cleaning the pond, applying primer, and painting the pond.
Cleaning the Pond
Before you can start painting your koi pond, you need to make sure that it is clean and free of any debris or algae. Here are the steps to follow:
- Remove any fish or plants from the pond and place them in a temporary holding tank.
- Drain the pond completely and remove any debris or algae using a pond vacuum or a net.
- Scrub the sides and bottom of the pond with a stiff brush and a mild detergent, then rinse thoroughly with clean water.
- Allow the pond to dry completely before moving on to the next step.
Applying Primer
Once the pond is clean and dry, it’s time to apply a primer. A primer will help the paint adhere better to the surface and provide a more even finish. Here’s how to apply the primer:
- Primer: Choose a primer that is specifically designed for use on ponds and follow the manufacturer’s instructions for mixing and application.
- Application: Apply the primer using a paintbrush or roller, making sure to cover the entire surface of the pond.
- Drying Time: Allow the primer to dry completely before moving on to the next step.
Painting the Pond
Now it’s time for the fun part – painting the pond! Here are the steps to follow:

- Paint Selection: Choose a paint that is specifically designed for use on ponds and follow the manufacturer’s instructions for mixing and application.
- Proper Application: Apply the paint using a paintbrush or roller, making sure to cover the entire surface of the pond.
- Reapplication: Apply a second coat of paint if necessary, allowing the first coat to dry completely before applying the second coat.
- Drying Time: Allow the paint to dry completely before refilling the pond with water and returning the fish and plants.
By following these steps, you can create a beautiful and long-lasting finish for your koi pond that will provide years of enjoyment.
After Painting
Completing the painting of a koi pond is a significant step in enhancing its appearance and functionality, but the process doesn’t end with the last brushstroke. The following section outlines essential actions to take after the painting is done, ensuring a smooth transition back to a healthy and vibrant aquatic environment.
- Allow Proper Drying Time: Follow the manufacturer’s instructions for drying and curing time. This may require leaving the pond empty for a specified period.
- Inspect the Work: Check for any missed spots, drips, or inconsistencies in the paint application, and touch up as needed.
- Clean Up: Safely dispose of any leftover paint, brushes, rollers, and other materials according to local regulations. Clean the surrounding area of any accidental spills or splatters.
- Reintroduce Fish and Plants: Once the paint has fully cured and the pond has been refilled, carefully reintroduce the fish and plants to their habitat. Monitor them closely for any signs of stress or discomfort.
- Monitor Water Quality: Test the water for pH, ammonia, nitrite, and other key parameters to ensure that it’s safe for the koi. Make any necessary adjustments to the water chemistry.
- Document the Process: Keep a record of the paint used, including the color, type, and date of application. This information may be useful for future maintenance or touch-ups.
- Enjoy Your Pond: Take a moment to appreciate the refreshed appearance of your pond and the enhanced environment you’ve created for your koi.
By following these post-painting steps, you can ensure a smooth transition back to normal pond operation and enjoy the renewed beauty and functionality of your koi pond for years to come.
Maintenance Tips
When it comes to maintaining your koi pond, regular cleaning and periodic repainting are essential. Here are some tips to keep your pond looking its best.
Regular Cleaning
Regular cleaning is crucial for maintaining a healthy koi pond. Here are some steps to follow:
- Remove debris: Use a skimmer net to remove leaves, twigs, and other debris from the surface of the pond.
- Clean the bottom: Use a pond vacuum or a siphon to remove debris from the bottom of the pond.
- Check the filter: Make sure the filter is clean and functioning properly.
- Test the water: Test the water regularly to ensure the pH and other levels are within the appropriate range.
- Add beneficial bacteria: Add beneficial bacteria to help break down organic matter and keep the water clear.

Join Our Koi Pond Community Today and Download our FREE eBook!
Periodic Repainting
Over time, the paint on your koi pond may start to fade or chip. Periodic repainting can help keep your pond looking its best. Here are some tips to follow:
- Drain the pond: Drain the pond completely and let it dry.
- Clean the surface: Use a scrub brush and a mild detergent to clean the surface of the pond.
- Sand the surface: Use sandpaper to smooth out any rough spots or chipped areas.
- Apply primer: Apply a coat of primer to the entire surface of the pond.
- Paint the pond: Apply two coats of pond paint, allowing each coat to dry completely before applying the next.
By following these maintenance tips, you can keep your koi pond looking beautiful and healthy for years to come.
Frequently Asked Questions
What type of paint should I use for a koi pond?
Use a paint specifically designed for ponds, preferably an epoxy pond sealant. These are non-toxic and safe for fish and plants. Avoid regular house paints, as they may contain harmful chemicals.
How do I prepare the pond for painting?
Drain the pond and relocate the fish to a safe holding tank. Clean the surface thoroughly to remove algae, dirt, and debris. Allow the surface to dry completely before applying the paint.
How many coats of paint are needed?
Typically, two coats are recommended. Follow the manufacturer’s instructions for the best results, allowing sufficient drying time between coats.
How long should I wait before refilling the pond and reintroducing the fish?
The drying time can vary depending on the paint used, but generally, it’s best to wait at least a week to ensure the paint has fully cured. Check the manufacturer’s instructions for specific guidelines.
Can I paint the pond with the fish still in it?
No, painting the pond with the fish inside is not safe. The fish should be temporarily relocated to a suitable holding tank to prevent exposure to toxic fumes and chemicals.
What precautions should I take when painting?
Wear appropriate protective clothing, including gloves and a mask, to protect yourself from fumes. Ensure good ventilation if you’re working in an enclosed space. Follow the manufacturer’s safety guidelines.
How do I maintain the paint job in the long term?
Regularly inspect the pond for any signs of wear or damage. If you notice any peeling or cracking, you may need to touch up those areas. Using a pond paint designed to withstand UV rays and harsh weather conditions will help maintain the appearance and integrity of the paint.
Can I use any color I want?
While you can choose from various colors, it’s best to select a shade that complements the natural environment of the pond. Darker colors can help create a more natural look and may promote better fish health by providing a more sheltered environment.
Remember, always consult with a pond professional if you’re unsure about any aspect of painting your koi pond, as improper painting can lead to long-term issues for both the pond’s appearance and the health of its inhabitants.